Using SSH keys and SSH agent
Most oftenly, the SSH client is used with a pair [user + password] to connect to a remote machine.
However, it is strongly recommended to use authentication via private/public key pair [1] to connect to a remote server.
Note
As a good analogy, it is like using a public padlock (public key) and a private key (which is securely locked).
Moreover, using an SSH agent, you can avoid typing passwords everytime.
Generate a key set
To generate your personal key set, use the same commands as the one to generate the PSMN internal key.
Warning
IMPORTANT STEP ADDED : define a passphrase to lock your private key.
For Windows users, relate to Windows 10 documentation.
For Linux, BSD et MacOS X, here are the main steps to follow:
Step 1 : Start generating a set of keys
In a ‘terminal’, use the ssh-keygen command:
user@workstation:~$ ssh-keygen
Generating public/private rsa key pair.
Enter file in which to save the key (/home/user/.ssh/id_rsa):
            <Appuyer la touche Enter>
Created directory '/home/user/.ssh'.
Enter passphrase (empty for no passphrase):
Note
New default parameters of SSH may generate a ed25519 key type. Replace .rsa by .ed25519 in next parts of this documentation.
Step 2 : Choose a good/strong passphrase
This is a bad passphrase:
toto
If the passphrase is too short or too poor, the program will answer:
Enter same passphrase again:
passphrase too short: have 4 bytes, need > 4
Saving the key failed: /home/user/.ssh/id_rsa.
This is a good passphrase (altought quite complicated):
A bottle of "Glenfîddich Rare Collection 1937" cost 15 000 euros VAT. Minimum...
You can use diceware, on allo-psmn, to create a random passphrase (And/or apg for randomly generated passwords). But creating your own is a much better practice.
~$ diceware --delimiter " "
Cathouse Acid Tripping Perkiness Chop Footrest
Be aware that altought any lettering is allowed in passphrases, using unicode might cause problems.
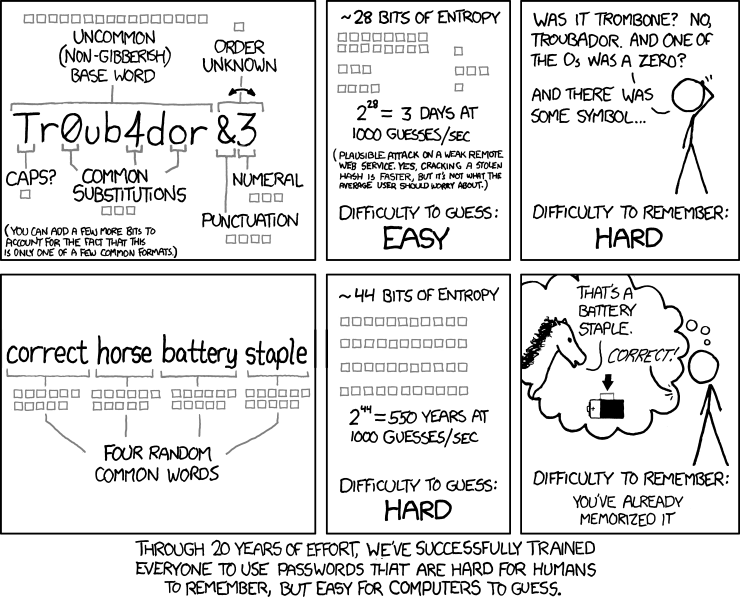
You can read this excellent article about usability of passwords.
Step 3: Finish the keyset generation
Finally ssh-keygen says:
Enter same passphrase again:
Your identification has been saved in /home/user/.ssh/id_rsa.
Your public key has been saved in /home/user/.ssh/id_rsa.pub.
A fingerprint is also generated (as below):
The key fingerprint is:
7a:ec:b2:1c:90:f5:2f:77:c5:bc:36:8b:0f:23:2e:76 user@workstation
The key's randomart image is:
+--[ RSA 2048]----+
|                 |
|                 |
|      .          |
|     o .     o   |
|    o   S     +  |
|     . o .   . . |
|      o + + + +  |
|     ..+o+Eo = o |
|      o+.o. ..o  |
+-----------------+
Step 4: Save your ssh key set
You can copy/paste the fingerprint verification (fingerprint + randomart image) into a file ~/.ssh/fingerprint.
Save a copy of your private key (id_rsa), your fingerprint file (fingerprint) and your public key (id_rsa.pub), in a safe and personal place (a USB key, for example).
Load ssh agent
Linux / BSD / MacOS X
The simplest way to load your ssh-agent is:
ssh-add
The agent will be loaded for the entire session on all opened terminals.
Tip
There’s a lot of alternative methods:
Use
ssh-askpass,ssh-askpass-gnomeorksshaskpassfrom your favorite distribution…load ssh-agent in a script:
eval `ssh-agent`
ssh-add
[deprecated] Install and use
keychain(CLI tool, use Github release page, see keychain documentation for installation).
You can use a script (in your ~/.bashrc) to start keychain, and use it in your session:
# add key(s) to agent
eval `keychain --eval --agents ssh id_rsa`
Note
On MacOSX Keychain, you may add the option ‘’–inherit any’’ (If, every time you open a new Terminal window, keychain ask for your passphrase, remove the ‘’–inherit any’’ option):
# add key(s) to agent
eval `keychain --eval --agents ssh --inherit any id_rsa`
Windows
See this documentation to activate SSH on Windows 10, then use the commands above.
Broadcast the public key
For the automatic login to work (ie: without password, but with passphrase), your personal public key (or padlock, id_rsa.pub) must be on all target servers, into the ~/.ssh/authorized_keys file.
At PSMN, your /home is shared between all nodes, so, from your workstation, simply do as below:
scp ~/.ssh/id_rsa.pub mylogin@allo-psmn:~/id_rsa.pub.perso

mylogin@allo-psmn's password:
id_rsa.pub                    100%  9KB 9.3KB/s   00:00
Then add (>>) your public key to ~/.ssh/authorized_keys:
ssh mylogin@allo-psmn
mylogin@allo-psmn's password:

cat id_rsa.pub.perso >> .ssh/authorized_keys
exit
If you have successfully loaded your ssh-agent, you can now login to allo-psmn without providing your password:
user@workstation:~$ ssh mylogin@allo-psmn.ens-lyon.fr
(mylogin corresponding to your login at PSMN)
Hops and multihops
The servers (calculations, preview, data) are sometimes behind several firewalls or gateways (or multi-hop SSH, “rebonds” SSH in French). The SSH documentation explains how to pass a single gateway (ProxyCommand option). It is possible to cumulate this system of “bridge jump” several times. For this example, we will detail multi-hop SSH from the network shown below.
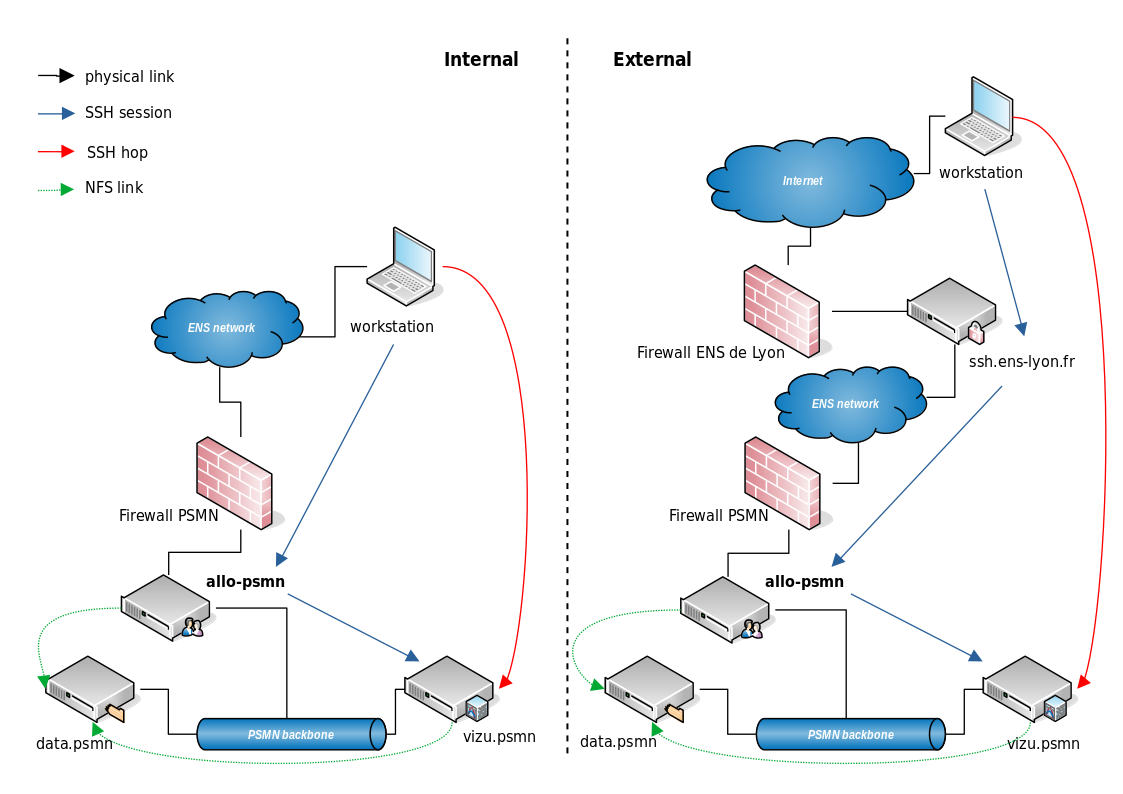
Fig. 6 The Workstation (your computer!) reach the server vizu.psmn through two SSH gateways (red path).
From a Mac/Linux/BSD machine
Manual multihop
We are going to manually accumulate connections (blue paths):
user@workstation:~$ ssh mylogin@ssh.ens-lyon.fr
mylogin@ssh.ens-lyon.fr:~$ ssh allo-psmn
mylogin@allo-psmn:~$ ssh vizu.psmn
mylogin@vizu.psmn:~$
These manual operations can be automatized (ssh.ens-lyon.fr must be replaced by ssh.psmn.ens-lyon.fr if you don’t have an ENS account).
Automated multihop
You need to add the gateways and target servers entries in the ~/.ssh/config file on your workstation. By adding up the different connections as you go.
Configuration example
You can automate these connection steps by using this SSH config file (~/.ssh/config) on your workstation.
Host *
    ServerAliveInterval 60
    ForwardX11Timeout 1d
    TCPKeepAlive yes
    ForwardAgent yes
    ForwardX11 yes         # for Linux
#    ForwardX11Trusted yes  # for MacOSX
    Compression yes
#    StrictHostKeyChecking no
    StrictHostKeyChecking accept-new
    HashKnownHosts no

###
# internal gateway
Host allo-psmn
    HostName allo-psmn.psmn.ens-lyon.fr
    User myloginpsmn

# connection to x5570comp1 from within ENS network
Host x5570comp1
    Hostname x5570comp1
    User myloginpsmn
    # ProxyCommand ssh myloginpsmn@allo-psmn netcat -w1 %h %p
    ProxyJump allo-psmn

# connection to e5-2670comp2 from within ENS network
Host e5-2670comp2
    Hostname e5-2670comp2
    User myloginpsmn
    # ProxyCommand ssh myloginpsmn@allo-psmn netcat -w1 %h %p
    ProxyJump allo-psmn

###
# external gateway
# pay attention to logins!

Host ssh-psmn
    Hostname ssh.psmn.ens-lyon.fr
    User myloginpsmn

Host ssh-ens
    Hostname ssh.ens-lyon.fr
    User myloginens

Host allo-externe
    HostName allo-psmn.psmn.ens-lyon.fr
    User myloginpsmn
    # ProxyCommand ssh myloginpsmn@ssh.psmn.ens-lyon.fr tcpconnect allo-psmn %p
    ProxyJump ssh-psmn
    # User myloginens
    # ProxyCommand ssh myloginens@ssh.ens-lyon.fr tcpconnect allo-psmn %p
    # ProxyJump ssh-ens

# connection to x5570comp1 from outside ENS network
Host x5570comp1-ext
    HostName x5570comp1
    User myloginpsmn
    # ProxyCommand ssh myloginpsmn@allo-externe netcat -w1 %h %p
    ProxyJump allo-externe

# connection to e5-2670comp2 from outside ENS network
Host e5-2670comp2-ext
    Hostname e5-2670comp2
    User myloginpsmn
    # ProxyCommand ssh myloginpsmn@allo-externe netcat -w1 %h %p
    ProxyJump allo-externe
You need to replace myloginpsmn by your own PSMN login, and myloginens by your own ENS login (if you have an ENS account). If you use ProxyCommand, netcat -w1 can be replaced by tcpconnect.
You can use as many hops as you need. The list of connection servers (login nodes) to the PSMN is available here.